Windows 10 Setup
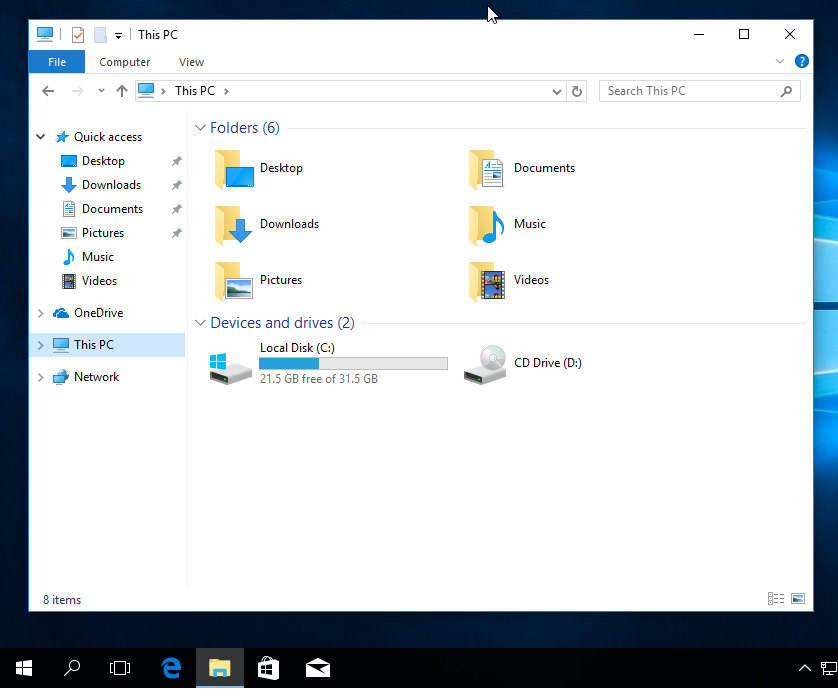
On Windows open “File Explorer”. Click on “This PC”.
Right click on empty space. Similar menu will be shown.
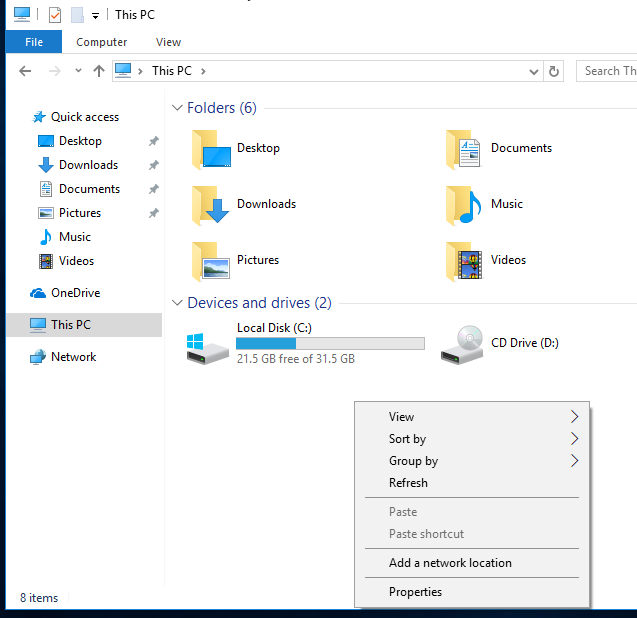
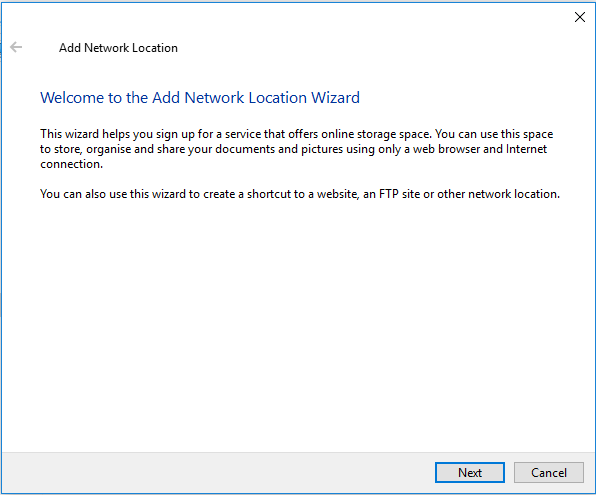
Select Add a network location from the menu. The wizard will pop up.
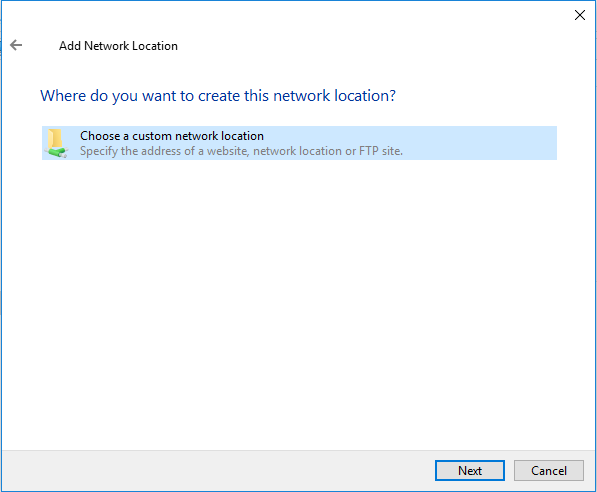
Select Choose a custom network location and click Next.
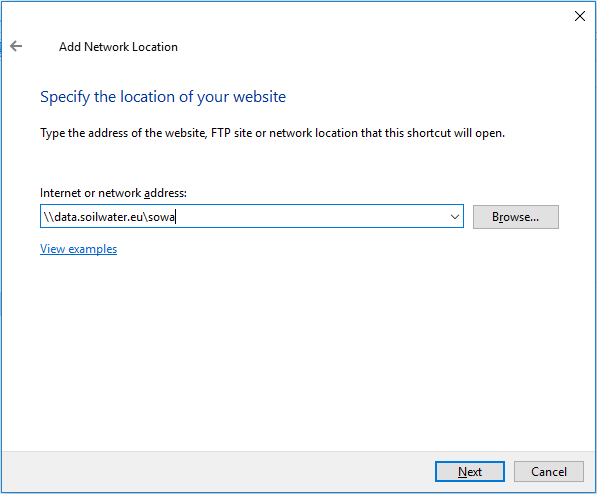
Type the share location. See complete list of shares for available shares and connection parameters overview. Than click Next.
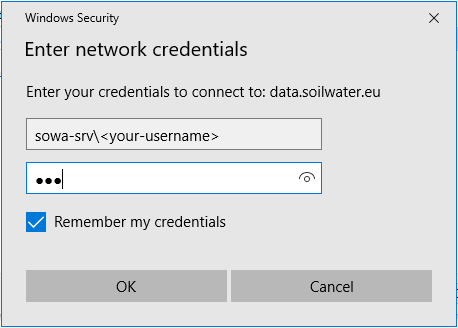
Following window should pop up. Please enter your credentials and click Ok.
Warning
The username must be prefixed with the share domain name something like: SOWA-SRV\<YOUR-LOGIN>
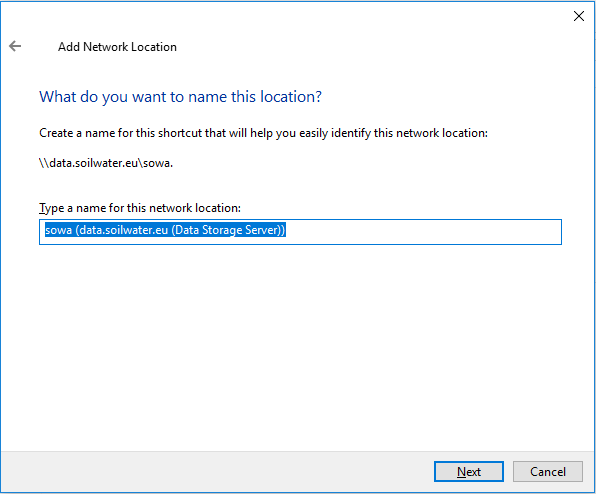
Now you can give the share a name, or leave it as is. Click Next.
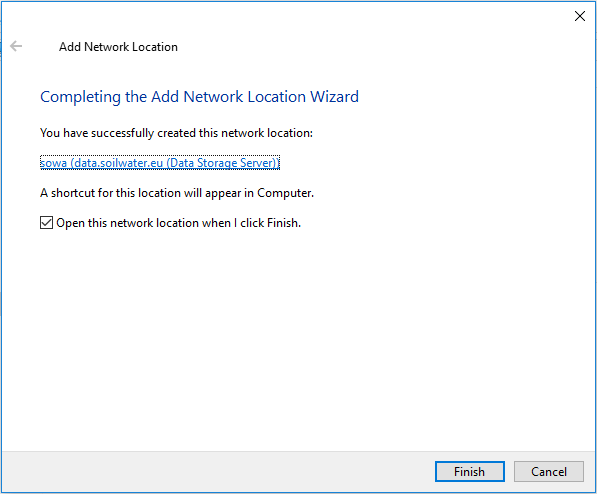
If everything works ok, following window will be shown. Click Finish and you are done!
Hint
Repeat this procedure for each shared folder you have access to.